Wow, has it really been a year since I have blogged! Yikes! Well I better be working on changing that.
I am going on a trip to Mexico, and want a dressy dress to wear for dinner. So I decided to make a dress. Not sure if this was a brilliant idea or not. Life is crazy, but then when isn't it? I have been wanting to try the Sis Boom Jenny pattern for a while now, and I figured I better get after it. I picked out some cheap fabric out of my stash, that I have had forever just to see how it goes together. I prefer not to do a muslin, and to do a complete dress in a cheap fabric. Muslin's can give a better idea about fit but I like to see exactly what its going to look like before cutting into expensive fabric.
It was an all day project, lol. Seems like any new pattern is, at least the first time I work it up. Plus I did full length so all that added fabric takes time. I love Sis Boom patterns because they are so detailed, I know exactly what to do. The fabric wasn't very cooperative for the zipper section though. It is a polyester, and didn't press well, and I couldn't find any glue.....yes house full of kids and no glue stick.. But I got it done, and it wasn't too bad, plus it's under the arm so it doesn't stick out if you don't have it perfect.
By measurements, I did a 2x, which turned out to be very big.... But overall I like how the dress looks. So now I need to print out and get the next size smaller pattern ready. I also decided I am not going to do the modest neckline....if you've got it flaunt it, lol! With a little modification this dress is totally wearable and pretty, so I am happy. I will do one more full dress before cutting into my expensive fabric though!
Adventures of a mama in the world of design. For the love of my family, fabric and the combination of the two.
Tuesday, January 21, 2014
Monday, January 28, 2013
For the love of Fabric and their Designers
Originally I wanted curtains for my kitchen, but if I did that, they might not fit our next house and I would be sad I used the fabric. After some serious thinking I decided to make an apron. I use my apron very frequently, it hangs in my kitchen where I can see it even when I am not using it. Yes the perfect solution.

I wanted it to be reversible because then I could use the 2 fabrics, so I decided to use the Church Ladies Apron pattern by Mari Mulari. I love the fit of the apron and the ease of no neck ties. I do not however really like sewing it. The neck is fussy and the rounded pockets are also fussy. I ended up cutting off the round end and making it square. But it was totally worth it in the end! The apron turned out gorgeous!
While looking for more of this fabric I came across the designers website. There, was listed her email address. I decided that I would share with her my love for her fabric and a photo of my apron. I wasn't expecting even to hear a response.
I was however greatly surprised to find 2 emails from her. Thanking me for taking the time to compliment her fabric designs. She has not been designing for a while and recently made the decision to get back into it, and my kind words had reaffirmed that she made the right decision. It was very nice to know that a few minutes to email her could be so worthwhile!
I look forward to seeing new designs! Until then I will continue to worship my new apron ;)
Wednesday, January 18, 2012
The healing power of sewing!
I finally made time to do some sewing in the past couple of days. It really helps with my depression when I sew. I can't explain how or why but it keeps me sane, or mostly anyhow! I started by finishing up a UFO (un-finished object) for my son Aiden. It was a pair of lounge pants in Christmas Thomas fabric from 2 years ago that I cut out. He found it and demanded I get right on that. I didn't even think they would still fit after 2 years but with a narrow hem they fit him perfectly, as long as he doesn't grow...at all. But he was happy and I was on a roll. Next I used the v-neck Jalie pattern to make a new shirt for my Zumba class. I didn't get a pic of the the shirt though. I added extra length so when I raise my hands my belly doesn't hang out......I used the David and Goliath fabric "That's Queen Bitch to You"....Love it! Then today I wanted to try out the new dies for metal snaps that I got for my snap press. So I make a wallet using the TDK quilted wallet pattern available from sewing mamas for free. I have made several of these in the past and they come together pretty quickly. Well quickly today involved stopping frequently to deal with a sick child. Strep throat has hit our household. Then I had to pick up the one who is feeling better from the bus, followed by rescuing my hubby in town who locked his keys in the car. Ok back to the wallet. I used some scraps I had laying around for the outside and a fun bright fq for the lining and some of the pockets. I free motion quilted the outside with my Elna machine, its in need of a tune up, but it was functional. Did I happen to mention I love free motion quilting! I am going to get the Singer 604 Touch and Sew that my hubby scored for me at an auction, set up to be my quilting machine. It has the lovely cabinet, so I have a large level surface and it stitches beautifully. Pretty nice find for $7 which included the cabinet and a bazillion accessories. Enjoy the pics:)
| Front |
| Back |
| Inside.I think the pic just made this look crooked, it"s really not ! |
| Back opened up. |
| Close up of stitching. |
Tuesday, January 10, 2012
Free Pleated Stand Mixer Cover Pattern
This mixer cover pattern has meant a lot to me. It inspired me and encouraged me to do more sewing and designing. A while back while I still had my pattern on Etsy I was notified by a KitchenAid legal representative that I could not use their name or photos of my KitchenAid stand mixer in my listing. I had sold less than 10 patterns..... I was in no way claiming the pattern to be KitchenAid brand. Because this pattern is specifically designed to fit a KitchenAid stand mixer there really wasn't any way to re-word the pattern or listing so I removed the listings. I have stewed and debated on what to do with this for months. My conclusion is that I am going to share the pattern with everyone! Because I am no longer selling the pattern I hope to avoid any more issues. Please note that you can still sell items made from this pattern but you can't use the name KitchenAid or photos of the mixer itself in the listing.
I have the file saved in my google documents, it is a pdf document. Make sure before you print that you make sure "fit to page" is not checked. If you have any trouble let me know and I will try and help. coveredbydesign at hotmail.com
You can also contact me if you want to share pics of your creations or say thanks:) You can email me or find my facebook page and add a photo there.
Thursday, November 3, 2011
My New Zazzle Shop
I finally decided to open my own zazzle shop up, and I am glad I did. Some of my creations are spectacular, I especially love the shoes. Just in time for Christmas. I will continue to add more and more designs so keep checking back!
*note 1/10/12 shoes have been discontinued as they bring in new styles*
Wednesday, November 2, 2011
Bowser, Alligator and Red Riding Hood
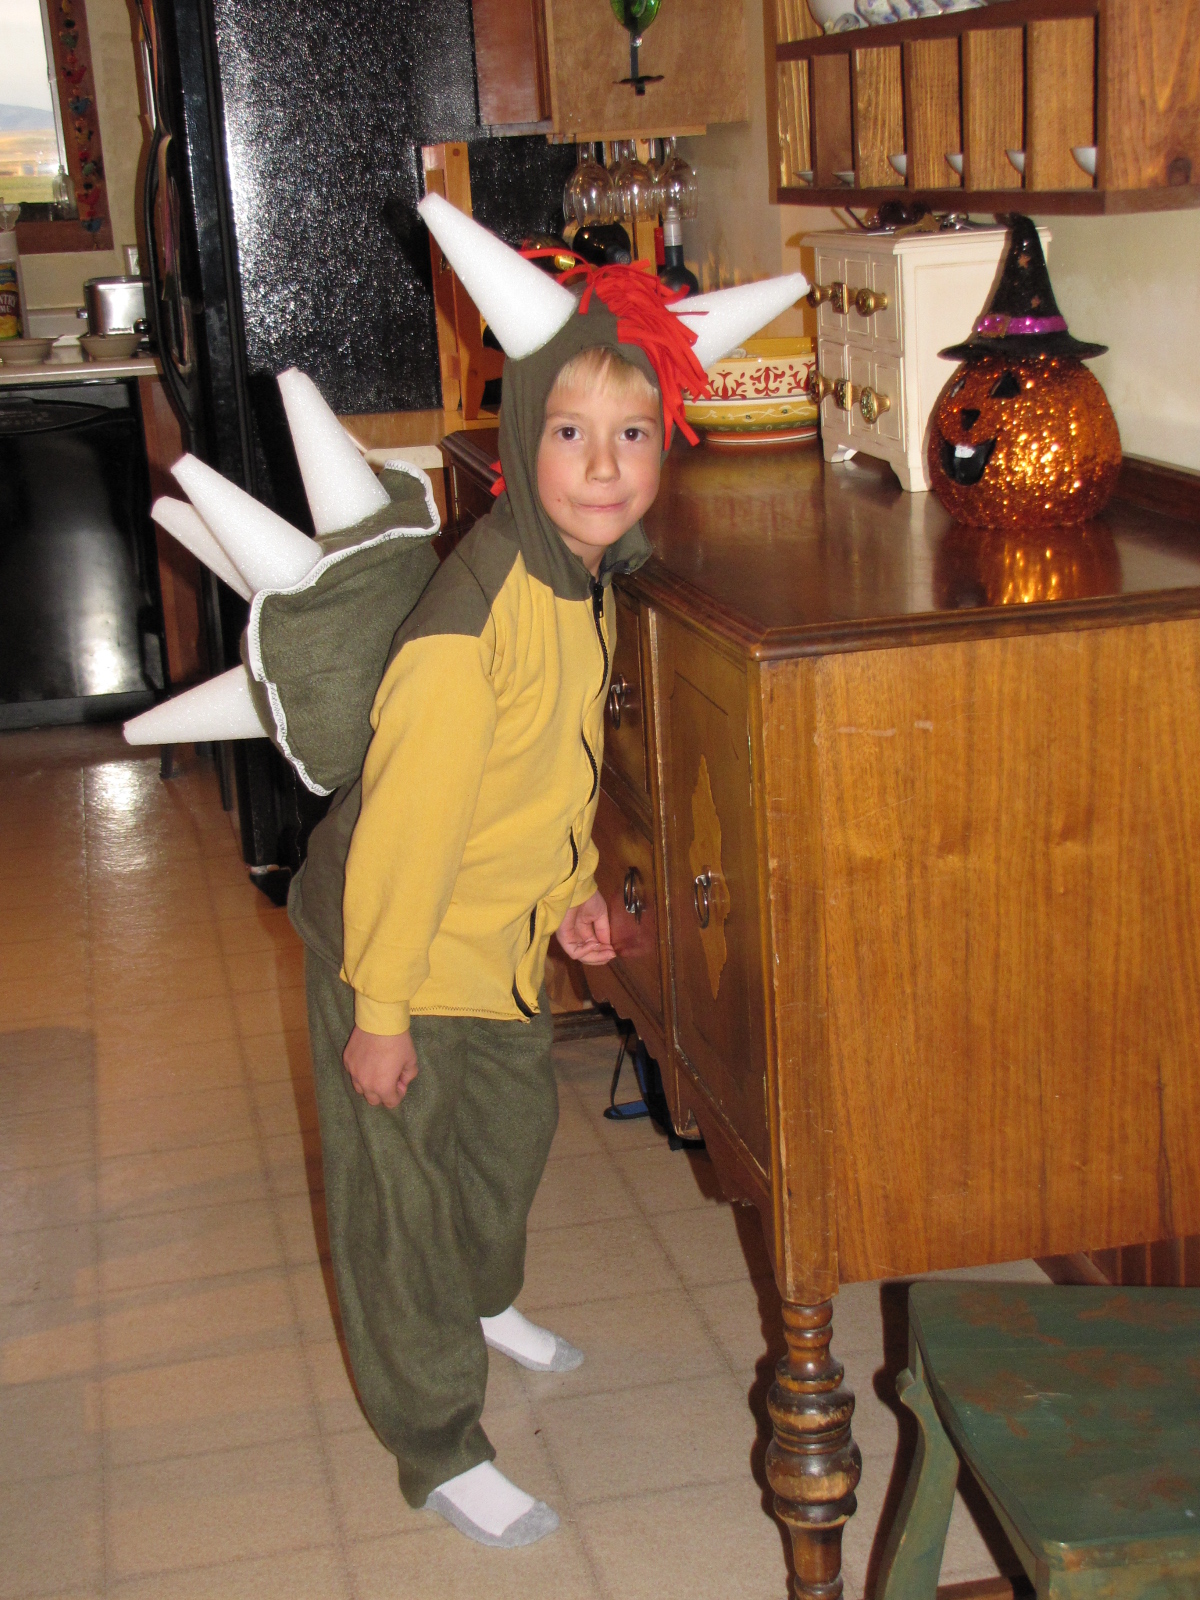
This year was full of requests from my children about what they wanted to be for Halloween. Most of which were requests for custom costumes. But alas only one got that this year. Cory has been wanting to be Bowser from Mario Bros for a long time and would have been the most devastated to get anything other. Aiden saw the alligator costume and fell in love with it and Hannah made a perfect Red Riding Hood, and not the silly little girlish one!
I did a lot of research on what the bowser costume should look like and finally got it together. I had the yellowish knit in my stash forever and this was the perfect application for it. I used an ottobre hooded sweatshirt pattern for the top, adding cut up bias tape for the red hair in between the seam of the hood. Then I glued on some styrofoam cones with hot glue for the horns. The pants were green fleece and based on an existing pair of pants. The shell was the most difficult. I ended up using a small bead filled pillow, round, and then I cut out the green fleece slightly larger to make the shell. I then added some white bias tape around the edge of the shell. Its hard to manipulate the stuffed pillow under the sewing machine for this part, lol. I added some string to make the shell like a backpack, because with the spikes he wouldn't be able to ride in the car with it attached to his back permanently. After adjusting the strings I added styrofoam cones to the back placing them strategically. Even after numerous trick or treating events last week we never lost a cone. I glued them both on the bottom and also ran a bead around the edge of the cone to help cement it in. The costume is not a perfect match but certainly made my boy happy. I hope everyone had a wonderful Halloween!
Wednesday, September 7, 2011
A quest for a stylish lunch
So the kids came home today from their first day of school and were very crabby about not having lunch bags/boxes. Yes lunch got sent in a plastic sack because for the life of me I could not find one of the million lunch bags we already have. So to appease the little fashion nuts I did some {throw it together designing} of some lunch bags. Not perfect but they will do and hey they are better than plastic bags right? We'll see how the kids react in the morning. But right now its way past my bedtime and I have an early morning again.
Subscribe to:
Posts (Atom)