Hi everyone! I have been hard at work with some designing for a spoonflower contest for cut and sew gift bags. I am doing a tutorial to add to that and including dimensions if you don't want to use the cut and sew fabric from spoonflower. This tutorial is for a gift bag made from a fat quarter of wider fabric but will work for others as well, your final dimensions will just be different. The hippos on my cut and sew project are smaller than the ones available in my store, so yours will look a bit different but all the instructions remain the same. You can also use this same idea for any size of bag :) I especially love these bags for wrapping clothing, or odd shaped items.
My cut and sew fabric is available in my store
here.
Final Dimensions are 11x16" with about 11x13" of usable space below the tie.
Supplies:
- Thread (matching or coordinating)
- "Cut and sew" FQ from spoonflower
- or if you are using your own fabric you need 1 FQ of fabric, you will cut a 2x18" strip from one edge for your tie or you can use .5" extra wide double fold bias tap or ribbon instead of cutting the strip.
- Needle appropriate for your fabric
- scissors or rotary cutter
- pinking shears (only necessary if you want to trim the seams to help with fraying)
Instructions. If you have any questions please email me at coveredbydesign at gmail.com or post on my facebook page,
Covered By Design.
 Cut out your fabric.
 If you are using a cut and sew fabric from my spoonflower shop just cut out on the lines. If you are using your own fabric and not using the pre-made bias tape you need to cut a 2" strip from the left or right side of the fabric, it should be 18 inches in length. You can also use any smaller width of ribbon, and you don't need to fold and stitch the ribbon, Get creative, its not rocket science here :)
Start with the tie. If you are using pre-made bias tape skip to step 5.


1. Fold the tie wrong sides together on the shorter ends and press.

2. Unfold and then fold the raw edges in to meet the crease you just made,wrong sides still together, and then press.

 3. With fabric still folded in toward the center crease, fold in half again and press well.

4. Using pinking shears on the ends of the tie to keep it from fraying or fold to the inside 1/4 " on each end. I am leaving mine with just the pinking, but folded it to show you that option as well.

5. Using a zigzag or decorative stitch, stitch the entire length of the tie close to the open edge. You can also use a straight stitch and stitch down both edges.
6. Set the tie aside.
Making the Bag
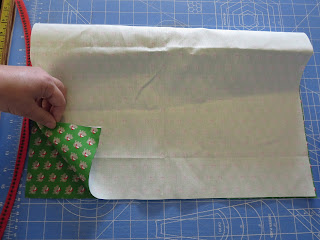
1. With the right side facing up bring the left edge over to the right edge of the fabric. This will give you a fold on the left side with the top, right and bottom open, and your fabric will be inside out. Make sure if you have directional fabric that you don't have it upside down.
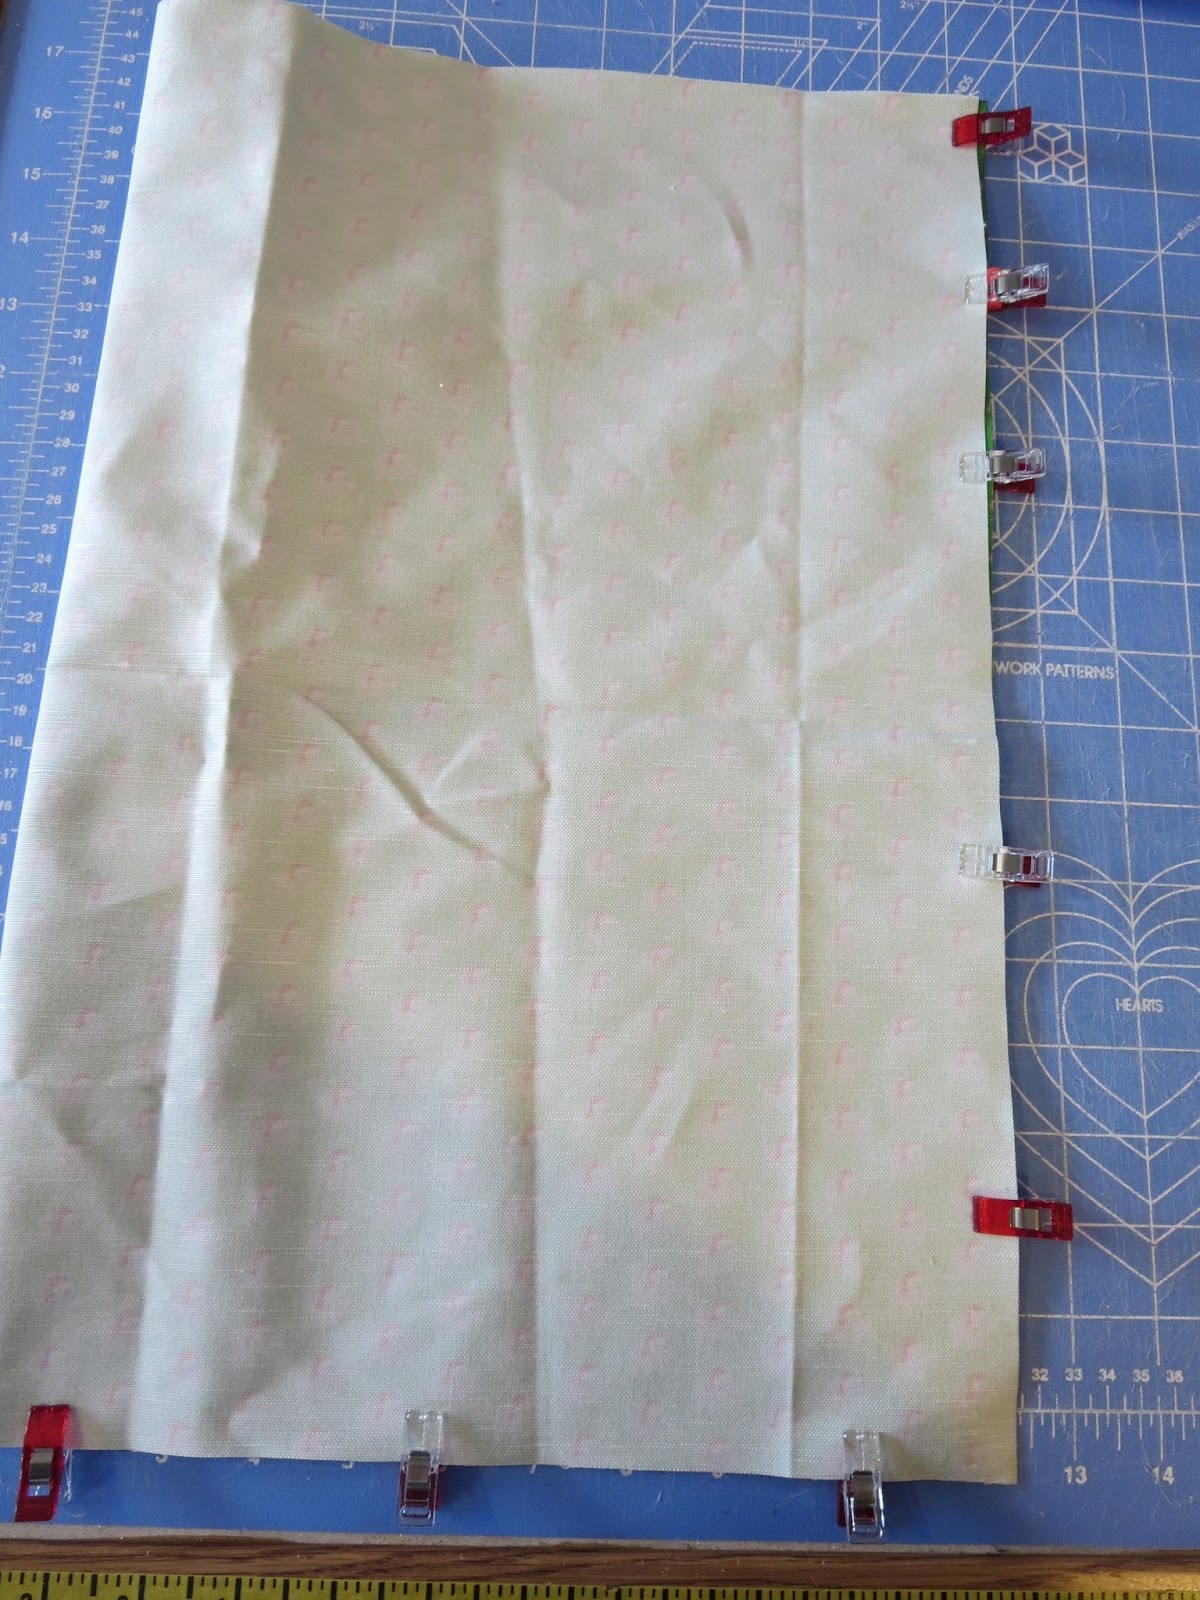
2. Even up all the edges and pin or use clips to keep them together.
3. Find the center of your tie and fold it in half.
4. Sandwich and pin the folded tie between the fabrics so that the folded center is even with the right edge of the fabric 3" down from the top right. Make sure your loose tie ends stay out of the seams.


5. Starting at the top right corner stitch down to the bottom right corner and then over to the bottom left corner using your favorite seam allowance. I use a 1/4" but feel free to use up to 1/2". **Make sure to back-stitch at the beginning and end and to go slowly over the tie as it will be thick. If you can back-stitch over the tie as well.
6. If you used a straight stitch on the seam you can help keep fraying down by trimming the edges with pinking shears but this is not necessary.
7. Turn the bag right side out.
8. Hem the top of the bag. I usually fold the top over 1/4" press then fold again 1/4" and press again. Then I stitch with a zigzag, decorative, straight or double needle stitch.


Enjoy!


 Cut out your fabric. If you are using a cut and sew fabric from my spoonflower shop just cut out on the lines. If you are using your own fabric and not using the pre-made bias tape you need to cut a 2" strip from the left or right side of the fabric, it should be 18 inches in length. You can also use any smaller width of ribbon, and you don't need to fold and stitch the ribbon, Get creative, its not rocket science here :)
 1. Fold the tie wrong sides together on the shorter ends and press.
 2. Unfold and then fold the raw edges in to meet the crease you just made,wrong sides still together, and then press.

 3. With fabric still folded in toward the center crease, fold in half again and press well.
 4. Using pinking shears on the ends of the tie to keep it from fraying or fold to the inside 1/4 " on each end. I am leaving mine with just the pinking, but folded it to show you that option as well.


 5. Starting at the top right corner stitch down to the bottom right corner and then over to the bottom left corner using your favorite seam allowance. I use a 1/4" but feel free to use up to 1/2". **Make sure to back-stitch at the beginning and end and to go slowly over the tie as it will be thick. If you can back-stitch over the tie as well. 6. If you used a straight stitch on the seam you can help keep fraying down by trimming the edges with pinking shears but this is not necessary.


 I am completely head over heals in love with the Itsi Bag pattern by Cloudsplitter Bags. I love Cloudsplitter Bags anyway, but this is a fun fast little purse to whip up! I was trying to find a way to use some of my fabric swatches from my fabric designs on spoonflower and this was just the ticket. The swatches work well for everything except the zipper pocket lining which I used a piece of kona cotton in a solid color.


 I scored some great clearance knit fabric at Joann's Fabrics and I knew immediately what pattern I would use. The Lacy Slope tank. I have tried the pattern before but didn't use my bust measurement....and it was too big. Lesson learned! So this time I actually used my bust measurement. It is such an easy pattern to whip up. The armholes were still a bit big so I just took it in a little under the armpits. The fit is good, maybe a little snug for my liking, mostly because I am very self conscious. I love the style of the top, it also has a longer length option as well! The best compliment of the day was when my husband asked me if I bought a new shirt. I said no, I sewed it. He responded "I can't tell the difference between the store bought and your sewing anymore." Yay! Anyhow here are some quick pics my daughter took. If you are in the market for tank top patterns, Greenstyle Creations has a few :)

 The Calypso messenger bag by Cloudsplitter Bags is a must have for laptops, tablets, school bags or for anything else you can fit in them. I was able to participate in the testing of this beauty and I am in love with the bag pattern, I love all of Cloudsplitter Bags patterns. They are well written easy to understand and go together well. Sydney also has a facebook group for her pattern lovers. https://www.facebook.com/groups/560775854062664/?hc_location=ufi
  My 13 yr old daughter picked the fabrics for my tester bag, and claimed it for her school bag. I made the large size, which fits my 17" laptop perfectly, but there is a smaller size included in the pattern perfect for tablets, kindles and smaller items and is perfect for a kids bag. There is a hidden pocket in the flap perfect for carrying things like SD cards or jump drives. There is a large zipper pocket, and slip pockets for a cell phone, pens or whatever you would like to put in it. Plenty of padding to protect your computer or tablets without being super bulky. The flap is a fun design that keeps the messenger bag from being ordinary and plenty of options for customization.
  Right now this wonderful pattern is 50% off so please run over and grab it up right now! You won't be disappointed!